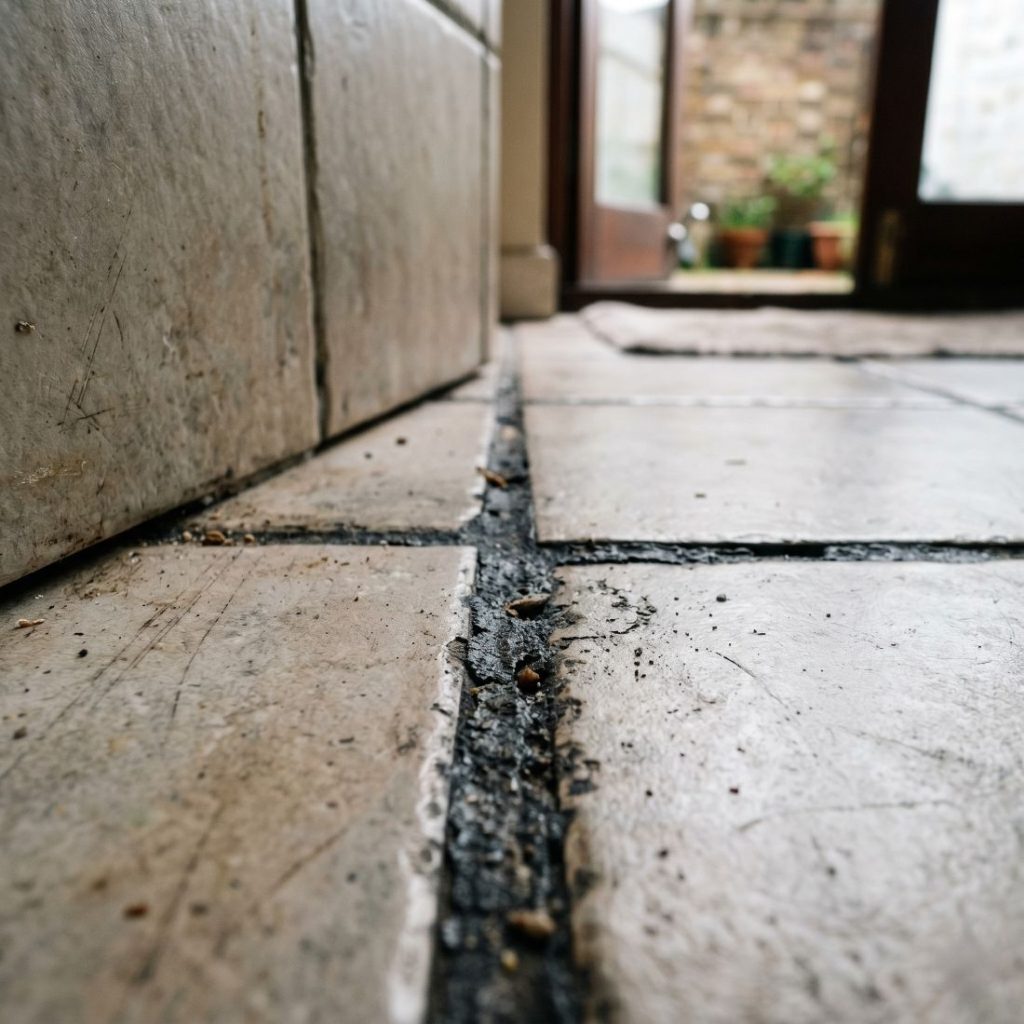
There is a slow, creeping betrayal that happens to tiled floors, and it is so gradual that you barely notice it until one day the penny drops. You are on your hands and knees retrieving something that rolled under the kitchen units, you glance at the floor at close range, and the horror dawns: the grout, which you are fairly sure was a cheerful biscuit beige when you moved in, is now a grim, streaky charcoal that would not look out of place in a Victorian coal cellar. It is one of those things that creeps up on you like a soap-opera villain, hiding in plain sight until the dramatic reveal. I have spent more hours than any sane person should crouched over filthy grout lines with a brush in hand, and I can tell you that beige is very often recoverable. Let me show you how.
Why Your Grout Turned Black in the First Place
To win this battle, it helps to know your enemy. Grout is, by its nature, slightly porous, which is a polite way of saying it is full of tiny holes just waiting to drink in whatever passes over them. On a floor, that means a steady diet of foot traffic, spilled food, mopping water that was a bit too grey, greasy residue drifting down from cooking, and all the general grime of daily life. Over time, all of that works its way into the grout and settles there, darkening it from the cheerful colour it started as into something altogether more sinister.
In bathrooms and other damp spots, you have a second culprit, and it is the more insidious of the two: mould and mildew. Where grout stays wet and the air stays still, black mould moves in and makes itself at home, and that is the deep, speckled black that no amount of casual mopping will shift. So before you start, have a quick think about which problem you are dealing with. Kitchen and hallway grout is usually ground-in dirt and grease, while bathroom grout is more often a mould situation. The good news is the cleaning approach overlaps a great deal, but knowing the cause helps you pick your weapon.
A Quick Word About What Your Tiles Are Made Of
Before you go anywhere near your grout with anything acidic, find out what your tiles actually are. Ceramic and porcelain tiles are tough as old boots and will happily put up with vinegar, bicarb and most cleaners you throw at them. Natural stone, however, is a different matter entirely. Marble, limestone, travertine and slate are all sensitive to acid, and a good dousing of vinegar or lemon will etch and dull them, leaving you with a far costlier problem than discoloured grout. If you have natural stone floors, skip anything acidic and stick to a pH-neutral stone cleaner or a gentle oxygen-based product. When in doubt, test a hidden corner first.
Getting Your Kit Together
This is a job where having the right tools to hand makes an enormous difference, so gather everything before you start rather than discovering halfway through that you are scrubbing with a worn-out nailbrush. You will want bicarbonate of soda, white vinegar (ceramic and porcelain only, mind), a tub of oxygen bleach for the tougher cases, and ideally a proper stiff grout brush, which is a narrow, firm-bristled little thing designed to fit right into the grout lines. An old toothbrush works in a pinch but will have you on your knees for hours. Add a bucket of warm water, some rubber gloves, a few clean cloths, and a kettle for hot water, and you are ready for battle.
The Methods, From Gentle to Heavy Artillery
I always start with the mildest approach that stands a chance and work my way up, because there is no sense reaching for the harsh stuff if a bit of bicarb will do the trick. Here they are, in ascending order of firepower.
The Bicarbonate of Soda Paste
For grout that is more grubby than truly black, a simple bicarb paste is a brilliant first move. Mix bicarbonate of soda with a little water until you have a thick paste roughly the consistency of toothpaste, then work it into the grout lines and leave it to sit for ten minutes or so. The bicarb is mildly abrasive and a natural deodoriser, so it lifts dirt and freshens at the same time. Then take your grout brush and scrub along the lines with a bit of welly, rinse with clean water, and admire the difference. For many kitchen floors, this alone takes you most of the way back to beige.
Adding White Vinegar to the Mix
If the paste alone is not cutting it on your ceramic or porcelain tiles, you can bring white vinegar into play. Spray or pour a little vinegar over the bicarb paste and you will get a satisfying fizz as the two react. That bubbling action helps loosen stubborn grime lodged deep in the pores. Let it work for a few minutes, scrub again, and rinse thoroughly. I will be honest that the science of mixing the two is more about the mechanical fizz and the combined cleaning than any magic chemistry, but it does genuinely help shift the gunk, and it is far gentler than the stronger options. Remember: this one is off the menu entirely if you have natural stone.
Bringing Out the Oxygen Bleach
When you are facing proper black mould or deeply ingrained staining, oxygen bleach is, in my book, the hero of grout cleaning. Sold as a powder, usually sodium percarbonate, you simply dissolve it in warm water to make a paste or solution and apply it to the grout. It releases oxygen as it works, lifting stains and killing mould without the eye-watering fumes and discolouration risks of chlorine bleach. Leave it on for fifteen to thirty minutes, keeping it damp, then scrub and rinse. It is gentler on coloured grout, kinder to breathe, and remarkably effective. This is the one I reach for most often when beige feels like a distant memory.
The Steam Cleaner and the Chlorine Last Resort
If you happen to own a steam cleaner, it is a marvellous chemical-free way to blast grime and mould out of grout lines using nothing but hot vapour, and the narrow nozzle attachments are made for exactly this job. As an absolute last resort on white or very pale grout, a diluted chlorine bleach will shift the most obstinate black staining, but I use it sparingly and with great care. Never use it on coloured grout, because it will bleach the colour right out and leave you worse off. Always work with the windows open and the extractor on, wear gloves, and never, ever mix bleach with vinegar or any other cleaner, because the fumes that combination produces are genuinely dangerous. When you have finished, rinse the area very thoroughly indeed.
The Technique That Actually Matters
Whichever product you land on, the real secret is in the scrubbing. Work along the grout lines rather than across them, keep your brush firm and your strokes deliberate, and do not be afraid to put your back into it. Tackle the floor in manageable sections so your cleaner does not dry out before you have scrubbed it, and change your rinse water the moment it turns grey, which it will, again and again. It is honest, knees-on-the-floor graft, and there is no app for it, but the transformation when a black grout line comes back to beige is one of the most satisfying things in all of cleaning. I do not make the rules.
When Cleaning Simply Will Not Do It
I would be lying if I said every grout line comes back from the dead. Sometimes the discolouration has soaked in so deeply, or the grout is so old and crumbling, that no amount of scrubbing will restore it. If your grout is cracked, missing in places, or stubbornly grey despite your best efforts, you have two good options. A grout pen lets you paint a fresh layer of colour straight over clean, dry grout, which is a quick and surprisingly effective cosmetic fix. For grout that is genuinely failing, regrouting is the proper answer, and while it is a faff, it is well within the reach of a confident amateur with a weekend to spare.
Seal It and Save Yourself the Bother Next Time
Here is the step almost everyone forgets. Once your grout is clean and bone dry, apply a grout sealer. This forms a protective barrier over those thirsty little pores, so dirt, grease and moisture can no longer sink in and take up residence. A sealed grout line stays cleaner for far longer and wipes up with a fraction of the effort, which means you are far less likely to find yourself back on your knees in a year’s time wondering where the beige went. Reapply it every year or two and your floors will thank you.
So there it is. Black grout looks like a lost cause, but with the right product matched to the right problem, a firm brush and a good dose of patience, beige is usually waiting just beneath the grime. Work gentle to strong, mind your tile type, seal it when you are done, and your floors will look years younger. Now put the kettle on; you have earned it after all that crouching.